This article explains everything you need to know about the Travel Expenses & Work Day Account (WDA) Modules.
Travel Expenses & Work Day Account (WDA)
TravelWDA & Expenses Overview
In the Adonis Employee Portal, you can register your travel expenses after your work travel (to/from vessel).
When finished you need to submit the travel expense report to your team leader for approval.
After it, corresponding travel activities will be created and added to APM > Activities datagroup.
From here you can also add Sick, Leave and Travel activities.
Please log in to the Employee Portal, for details click How to Log in
After logging in, go to ![]() >
> ![]() :
:
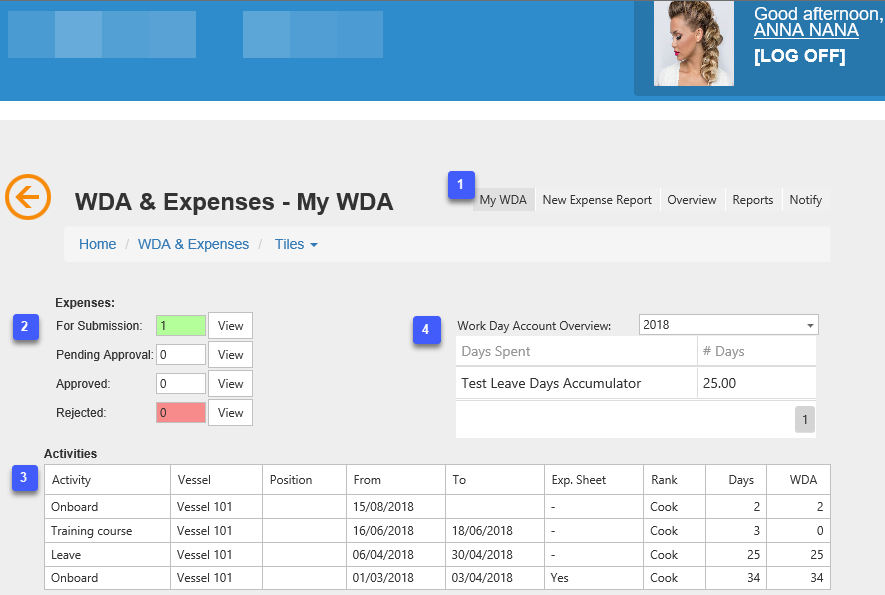
By default, you are on the My WDA screen, where you can see TE reports, activities, and leave days data.
New Expense Report – to create new Travel Expenses (TE) document.
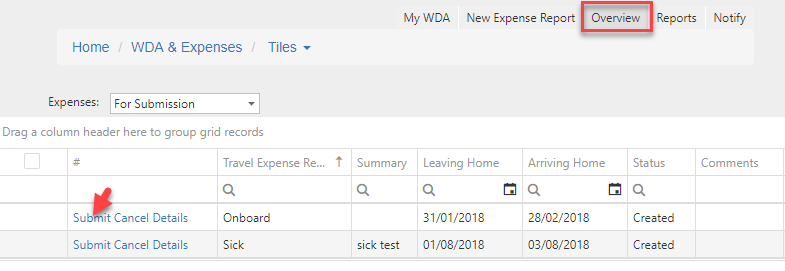
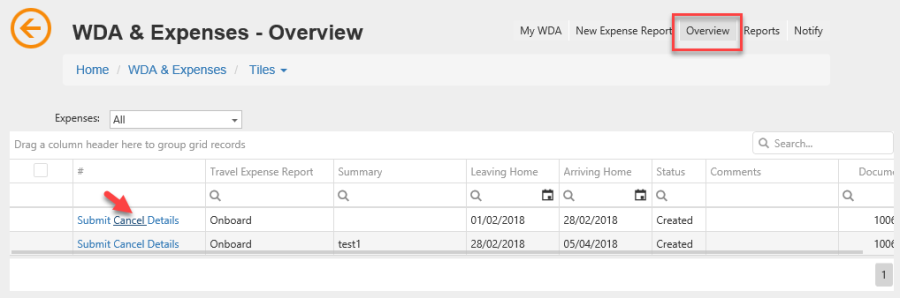
Overview – stores all your created, rejected, and submitted Expenses documents.
Reports – to generate 'My WDA' report.
Notify – to send notifications: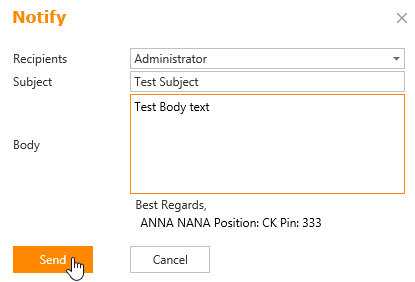
All your Travel Expenses documents:
-For Submission (created) – saved but not submitted documents. They can be edited and submitted to your coordinator/approver.
-Pending Approval (submitted) – created and sent for approval.
-Approved – if your coordinator finds that everything is OK with your Submitted Travel Expense, it will be Approved, and corresponding travel activities will be created in APM.
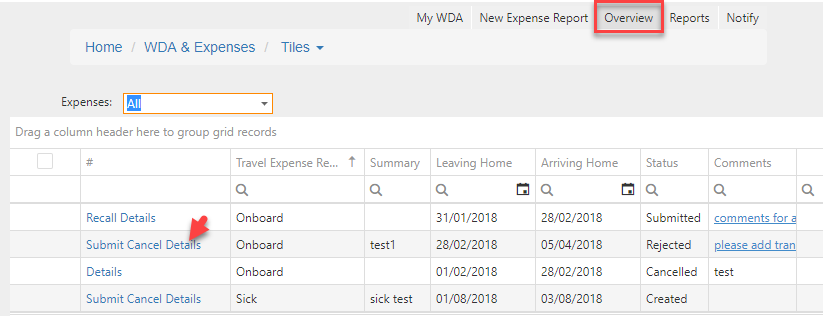
-Rejected – your coordinator may choose to Reject your travel expense if he finds that it's not correct or some data are missing.
In such a case, this document gets Rejected status.
You can review the approver's comments in the Comments column, e.g.:
Then make corrections before submitting again or just cancel.
From here you can review details of any TE doc. by clicking
button, which brings you to the Overview screen.
You can edit only created and rejected travel expenses.Your activities from APM with main information: activity type, vessel, date from/to, and total days.
Here you can also see if the activity already has a linked TE report – if Yes is displayed in Exp. Sheet column.In the Work Days Account Overview screen, you can see how many Leave days were spent for the selected year.
Click ![]() Help icon to get to user instructions on how to use WDA & Expenses module.
Help icon to get to user instructions on how to use WDA & Expenses module.
How to Create the Expense Report
After each travel, you can create and submit the expense document to report various expenses during your travel (transportation, accommodation, etc.).
Go to WDA&Expenses > My WDA > ![]() button to create the TE report:
button to create the TE report:
You will be switched to the Activity Dates tab to fill main information about your travel:
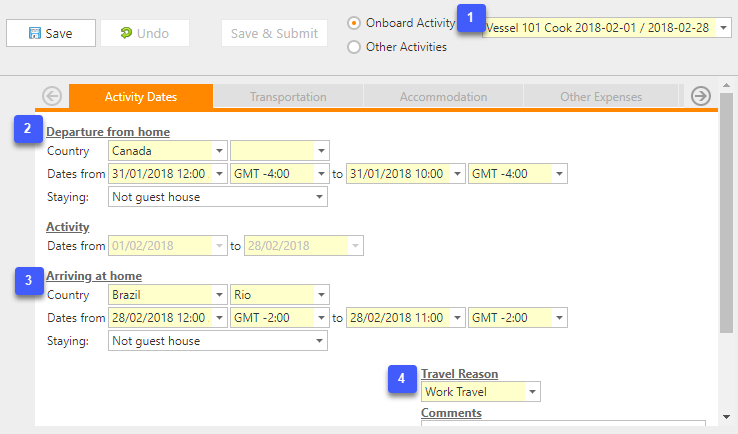
Select onboard (sea-service) activity to register your travel details and expenses.
-You can report expenses only for confirmed (Historical; with Date to) activities.
With the Other Activities option you can add activities (sick, leave, travel) with expenses details directly from here.
For details, see Register Expenses for Sick, Leave, or Travel section below.Fill in Departure from home (to the vessel) details: Country, City, Dates (time) from/to of your travel, and accommodation information.
-Date can not be later than the Start Date of onboard activity.Fill in Arriving at home (from a vessel) details: Country, City, Dates (time) from/to of your travel and accommodation information.
-Date can not be earlier than the Date To of onboard activity.Travel Reason – select the reason for your traveling from the drop-down list.
Leave comments if needed.
Click the Save button.
From now, the other tabs became available for reporting more information about your expenses.
In the next sections, we explain how to add various expenses.
Register Expenses for Sick, Leave, or Travel
From ![]() the screen you can also add a report per your Sick, Leave or Travelling with all expenses details.
the screen you can also add a report per your Sick, Leave or Travelling with all expenses details.
Then submit this document to your team leader.
Once approved, corresponding activities (sick, leave, or travel) will be added to your Activities datagroup in APM.
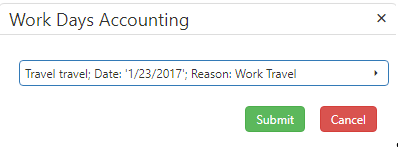
For this - select the Other Activities option > choose needed activity type in the drop-down and define required data (country, date from/to), reason, and comments if needed.
For example:
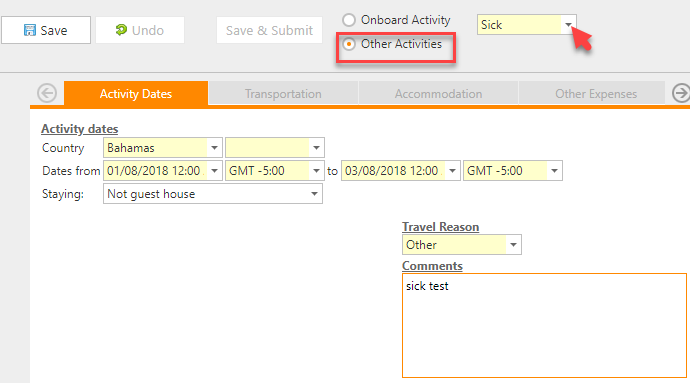
Clothe ick Save button.
If you spent some money on transport/hotel, etc. while you were ill, on leave, or traveling, you can register these expenses at corresponding tabs.
The process of adding expense records and submitting the report is the same as for travel days of the onboard activity.
See How to…. sections.
| Anchor | ||||
|---|---|---|---|---|
|
Go to ![]() tab > click
tab > click ![]() :
:
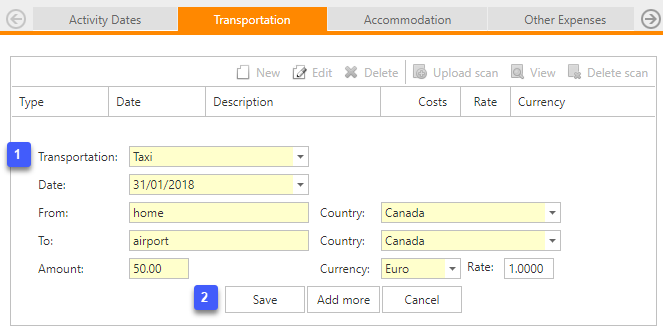
Select the type of transportation from the drop-down list, and input the date.
-Below are fields to fill depending on the selected transportation type.
Define the route.
Input the amount you spent, and select a currency.
-Fields on a yellow background are mandatory.
You will not be able to save info if they are not filled in.Once filled, click Add more to report another transportation expense for this day or Save to proceed with another expense.
You can click Cancel to cancel this registration.
Attaching Scans
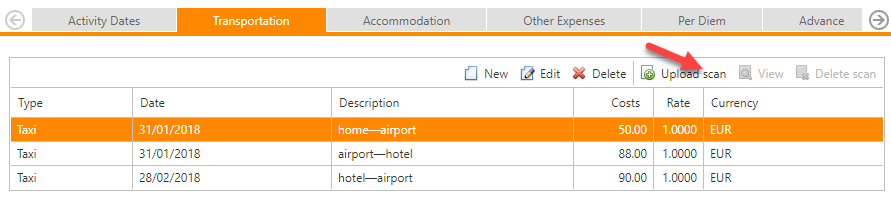
After transportation expenses record(s) are created, you can add scans of your bills if exist.
In Transportation grid, select target record > click Add scan and upload it from your local folder:
After you can ![]() or
or ![]() attachment from this screen or on the Scans tab.
attachment from this screen or on the Scans tab.
| Anchor | ||||
|---|---|---|---|---|
|
Go to ![]() tab > click
tab > click ![]() :
:
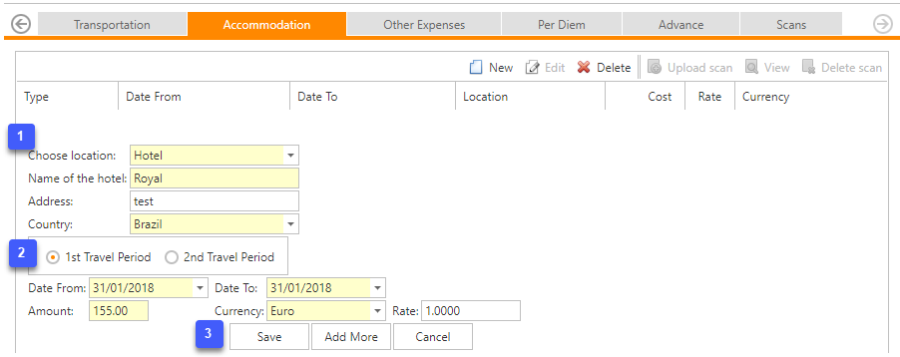
Select the type of accommodation from the drop-down list.
-Below are fields to fill depending on the selected type.
As in our example, for a hotel, define its name, address, and country.
-Fields on a yellow background are mandatory.
-You will not be able to save info if they are not filled in.Select 1st (to the vessel) or 2nd (from a vessel) Travel Period.
Fill in Date From – Date To fields
Input the amount you spent, and select a currency.Once filled, click Add more to report another accommodation expense or Save to proceed with another expense type.
You can click Cancel to cancel the current registration.
Attaching Scans
After the expenses record(s) are created, you can add scans of your bills if exist.
In the Accommodation grid, select target record > click Add scan and upload it from your local folder.
After you can ![]() or
or ![]() attachment from this screen or on the Scans tab.
attachment from this screen or on the Scans tab.
| Anchor | ||||
|---|---|---|---|---|
|
If you need to register other expenses (net, phone, parking) not included in transportation/accommodation categories, go to ![]() the tab.
the tab.
Click ![]() :
:
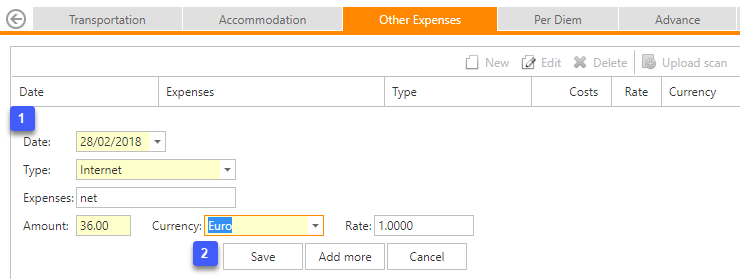
Define Date.
Select the Expense Type from the drop-down list.
Type its short description in the Expenses field.
Input the amount you spent, and select a currency.
-Fields on a yellow background are mandatory.
You will not be able to save info if they are not filled in.Once finished, use Add more button to report another expense of such kind or Save to proceed.
You can use Cancel to cancel this registration.
Attaching Scans
As for all types of expenses, you can add scans of your bills.
After saving, select target record > click Add scan > upload it from your local folder.
After you can ![]() or
or ![]() attachment from this screen or on the Scans tab where all scans are stored.
attachment from this screen or on the Scans tab where all scans are stored.
| Anchor | ||||
|---|---|---|---|---|
|
To register if you have got any meals covered by the hotel, provided by the customer, or paid by another employee, use ![]() tab.
tab.
For example:
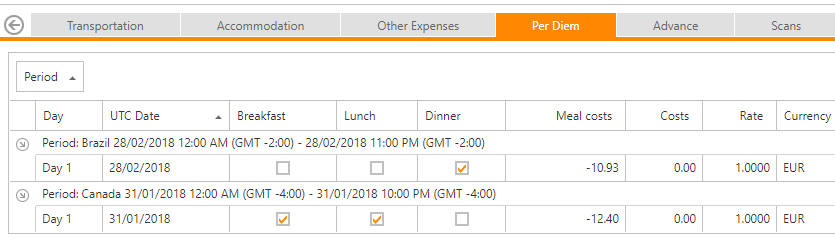
>Breakfast
If breakfast is included in the hotel price, you need to deduct this meal by selecting the check box for every such day.
>Lunch
If a hot meal were provided by the hotel for no extra charge, you need to deduct this meal for every day provided.
>Dinner
If a hot meal were provided by the hotel for no extra charge, you need to deduct this meal for every day provided.
Changes are saved automatically.
| Anchor | ||||
|---|---|---|---|---|
|
If you need to register any types of advances, go to ![]() tab.
tab.
E.g. if you have added the Air Fare amount under Transportation,
but this is invoiced directly to your company,
you need to add the amount as an advance, so it is deducted.
Click ![]() :
:
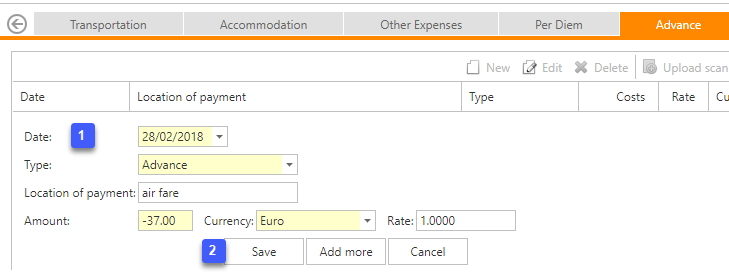
Indicate Date.
Select the Type of advance from the drop-down list.
Type a short description in the Location of payment field.
-Fields on a yellow background are mandatory.
You will not be able to save info if they are not filled in.
Attaching Scans
As for all types of expenses, you can add scans of your bills.
After saving, select target record > click Add scan > upload it from your local folder.
After you can ![]() or
or ![]() attachment from this screen or on the Scans tab where all scans are stored.
attachment from this screen or on the Scans tab where all scans are stored.
Adding Scans
If you have paper bills from your travel, you can scan them and attach them to corresponding expenses records.
You can upload scans directly on each Expenses category tab (transportation, accommodation, etc.) or a tab.
Click ![]() :
:
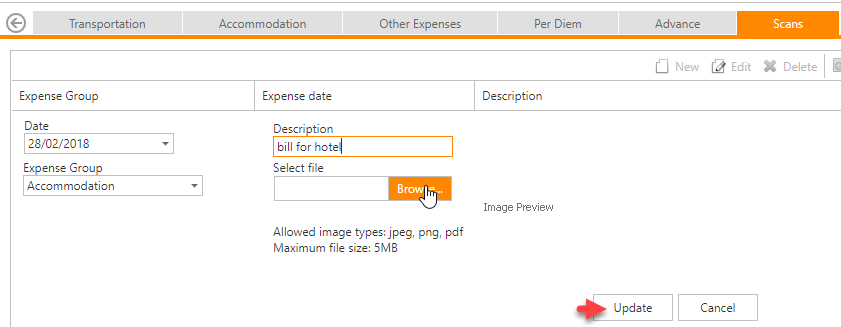
Define expense date, select group, and type a short description.
Click the Browse button to upload a scan and the Update button to save.
| Info |
|---|
After all expense records are created you need to go to |
Then you should submit your Expense document to your coordinator for verification and approval.
Summary
The totals for all filled expenses for accommodation, transportation, meals, etc., you can review in the Summary section on the right:
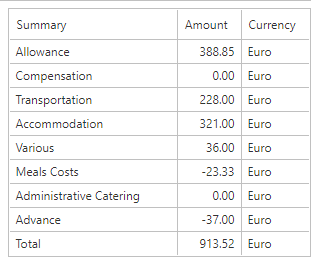
Here you can see calculated allowances for the whole trip, expenses separated by categories, and the Total amount.
Click ![]() to return to the Overview screen.
to return to the Overview screen.
| Anchor | ||||
|---|---|---|---|---|
|
After checking and making sure that your Travel Expense document is completed, you can submit it to your Coordinator.
This can be done directly from the Overview screen by clicking Submit:
A small Confirm window will appear, where you can add comments for your coordinator:
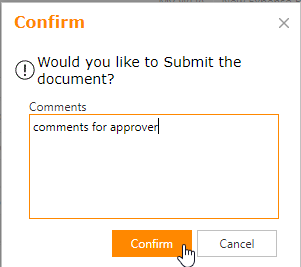
Click Confirm.
Note, please:
After submitting the document, its State from For Submission (Created) is changed to Pending Approval (Submitted).
From this time, you can not edit the document only review it.
But if you forgot to add some information, you can immediately Recall the report.
! Only at once after sending, until the coordinator approved it.
For details see the How to Recall Travel Expense section.
Once your document/report is approved by your team leader, its state will be changed to Approved.
Corresponding 2 travel activities will be added to your Activities datagroup in APM.
How to Recall Travel Expenses
If you submitted your Travel Expense document by mistake or forgot to add some information, you can immediately Recall it.
Then this document comes to your level with Created State (you can correct it and submit it again).
The document can be returned at once after sending it until the coordinator approved it.
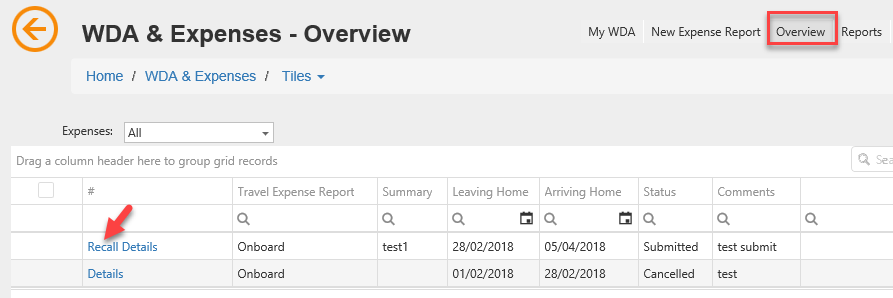
You can recall it from the Overview screen:
A confirmation window appears:
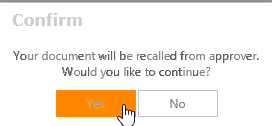
Click Yes.
Now your document is returned to your level with Created status, you can edit and resend it or cancel it.
How to Cancel Travel Expenses
You can cancel only not-submitted Travel Expenses.
To cancel your Travel Expenses document, please go to Overview screen > click Cancel for the needed record:
In appeared Confirm window, input a comment and click Confirm > OK buttons:
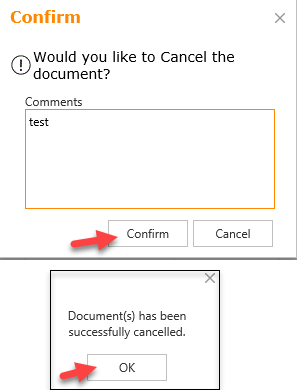
The document gets Cancelled status.
| Info |
|---|
Cancelled TEs can not be submitted again. |
How to Edit Travel Expenses
You can edit only Created and Rejected travel expenses documents.
Go to Overview screen > click Details:
You will be switched to the Travel expense details screen where you can modify main travel data and navigate between needed sections (transportation, accommodation, etc.) to update/add info.
Do not forget to use the Save button to apply each change.
My WDA Report
There can be situations when a person signs on a vessel or passes some courses/training, he needs to fly to another country and then back.
During this, he can spend some money on meals, transportation, hotel, etc.
After a trip, an employee creates special expenses document in Adonis Employee Portal (WDA module), inputs all travel details, and submits it to the coordinator/approver.
After it's approved or just created, you can run My WDA report, choose this document and review all details.
To access the report, please log in to Employee Portal > ![]() >
> ![]() > Reports:
> Reports:

Report Dialog:
Once you click the needed report from the report menu, a dialog window asks to add report parameters:
Select a needed document from the drop-down, where all your WDA documents are listed.
Click Submit button to preview the report.
Report Layout: The report can consist of several pages displaying travel and expenses details:
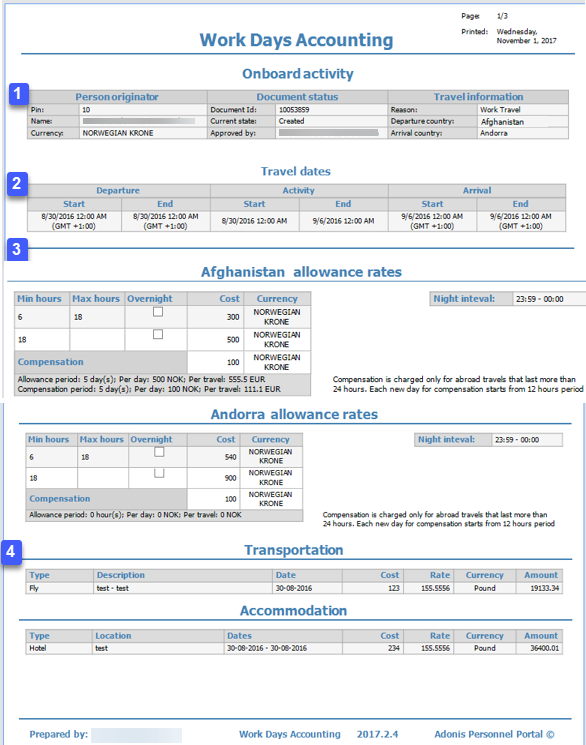
In this section, we see the following details:
Personal – your pin, name, and currency info;
Document - ID, current state/status, and by whom it was filled/sent (employee's name);
-In this case, 'approved' means created and confirmed because when you fill in some data in the document, you confirm that it's true.
Travel – the reason for traveling, departure, and arrival country.Here we can see travel and activity dates.
Rates and compensation information of departure and visiting countries.
Here can be various Expenses types details, for example, Accommodation, Transportation, etc.
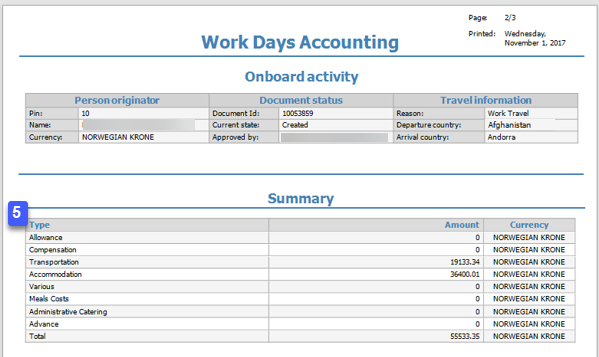
Summary of allowance, compensation, transportation, and additional expenses (e.g.: meal costs) displayed with total amounts and currency for each type and total.
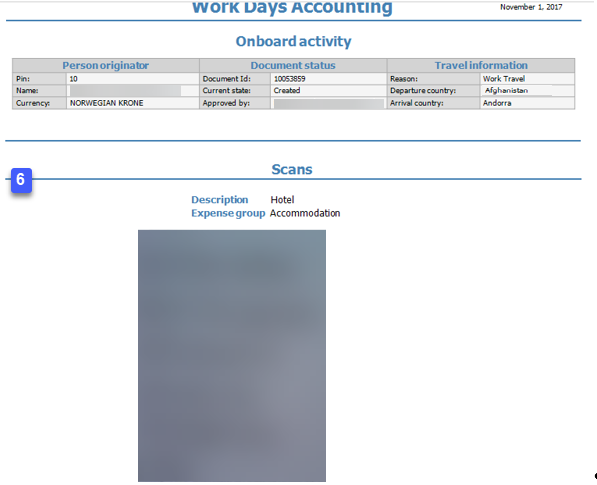
If you have attached a scan (e.g.: of the bill from the hotel where you stayed) to your document, it appears in the Scan section of the report.
| Anchor | ||||
|---|---|---|---|---|
|